A clean refrigerator isn’t just about keeping things tidy. It’s about ensuring that your food is stored in a safe environment, which directly affects its freshness and your health. Neglecting this crucial task can lead to unwanted bacteria and unpleasant odours, making your fridge’s contents less appealing. Keeping a regular cleaning schedule not only boosts food safety but also keeps your appliance running smoothly, saving you some bucks on repairs in the long run.
Now, let’s talk about efficiency. Life’s busy, and nobody wants to spend a whole afternoon scrubbing a fridge. Thankfully, cleaning your appliance doesn’t have to be a day-long affair. With the right approach, you can breeze through the task, keep things spotless, and free up your time for more exciting adventures.
Efficient cleaning methods aren’t about cutting corners. They’re about knowing what works best. From gentle cleansers that don’t leave harmful residues to practical strategies that hit even those hard-to-reach nooks, a well-planned cleaning routine ensures your fridge stays as fresh as your groceries.
What You Need to Get Started
Cleaning your refrigerator could be a breeze or a battle, all depending on having the right gear. So, let’s gear up like pros! First on the list, you’ll want some mild soap or a gentle all-purpose cleaner. Steer clear of anything too harsh or the infamous bleach—those could leave behind residues that mix poorly with your food.
White vinegar or baking soda is magic when it comes to natural cleaning. Not only are they effective, but they’re also food-safe, which is a win-win. White vinegar can cut through grime and kill some bacteria without any sidekick chemicals. Baking soda, on the other hand, is fantastic for deodorising those stubborn smells.
You’ll also need a few microfiber cloths and a sponge. Microfiber’s great because it picks up dirt and grime super well and won’t scratch up your surfaces. A toothbrush can be handy for those nooks and crannies, especially around seals and hinges. And, of course, a little elbow grease goes a long way.
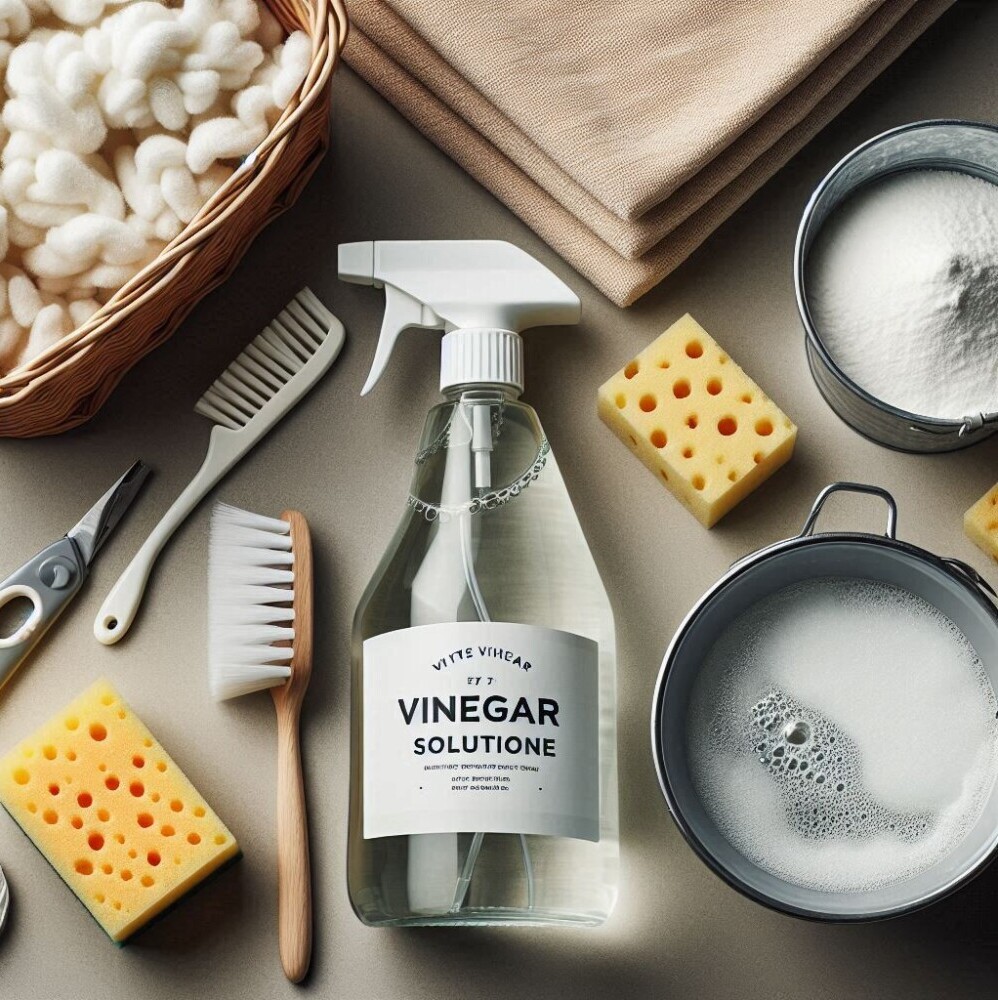
Finally, don’t forget a bucket of warm water to rinse your clothes or sponge. Keeping things simple with reusable cloths also means you’re doing your part in cutting down on waste. With these tools and a game plan, you’re set to conquer that fridge cleaning session efficiently.
The Step-By-Step Cleaning Process
Getting down to business means knowing exactly where to start. First thing on the agenda is emptying the fridge. Take all those goodies out, checking labels and expiry dates as you go. Spoiled or expired items? They get an all-expenses-paid trip to the trash bin.
Now, with a blank canvas before you, it’s prime time to remove shelves and drawers. Think of it like dismantling a puzzle for the ultimate clean-up. This move not only makes them easier to wash but also lets you hit those hidden spots.
A mix of warm water and soap—or that trusty vinegar solution—becomes your new best friend. Use your microfiber cloth to wipe down every surface inside the fridge. Avoid using abrasives to keep everything looking new.
Focus on those little areas that love to hoard crumbs and spills, like door seals and gaskets. This is where a toothbrush comes in handy, tackling build-up without much hassle.
Once you have a bright, clean look greeting you every time you open the door, put back your squeaky-clean shelves and bins. Returning the food comes next, organized by types and with the oldest stuff up-front, so nothing gets overlooked.
Deep Cleaning Your Refrigerator at Home
Deep cleaning a fridge isn’t just for big family holidays. It gives that extra sparkle and hits those spots where regular cleaning sometimes skips. Look carefully around the door seals, back corners, and under drawers—these are prime real estate for dirt and food bits.
Start by removing everything from the fridge, and I do mean everything, including shelves and drawers. Soak removable parts in warm soapy water while you tackle the interior. If any parts are particularly grimy, let them soak a bit longer to loosen the crud.
With your trusty vinegar and water solution, or baking soda paste, wipe down the interior walls, making sure every surface gets some TLC. Tough spots might need a little more love; that’s where your toothbrush comes to the rescue.
Don’t forget those back and bottom areas where dust and crumbs like to hide. Since these parts of the fridge don’t usually meet the cleaning cloth, they’re often the most neglected.
After everything’s clean and back in place, pay attention to leaks or unusual odours you might have missed before. If any gaskets or seals seem compromised, it might be time to replace them to keep your fridge running like a champ.
Common Mistakes to Avoid
Cleaning a fridge might seem straightforward, but some pitfalls can lead to unintended messes or even damage. One big no-no is using strong chemicals like ammonia or bleach. These can harm the plastic parts, and any leftover residues could mix with your food adventures. Stick to milder, food-safe options for peace of mind.
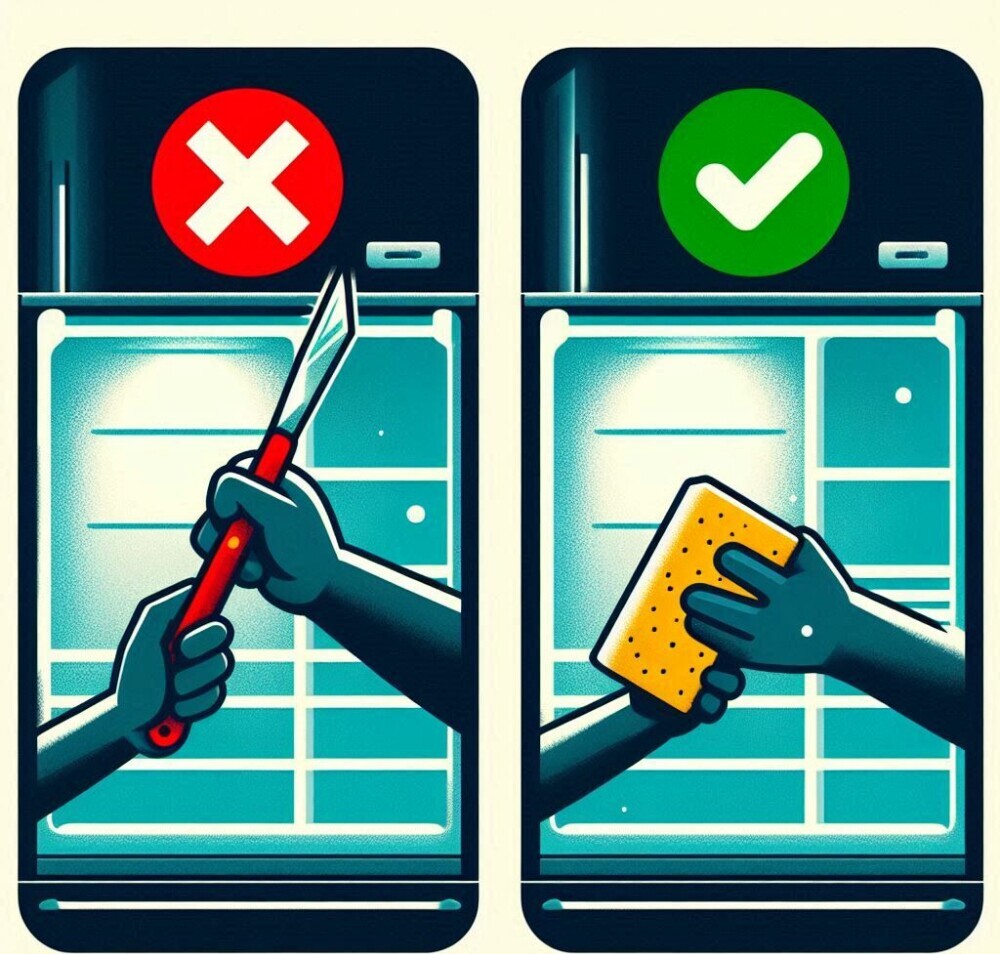
Another common misstep is using sharp tools to scrape off tough spots. It might seem like a quick solution, but it can scratch your appliance beyond repair. A bit of patience with a soapy sponge usually does the job without leaving scars.
Avoid ignoring the coils behind or underneath your refrigerator. Dust and dirt here make your fridge work overtime, spiking your energy bill. A quick vacuum around the coils a couple of times a year keeps things running smoothly.
Leaving your groceries out for too long while cleaning can also cause spoilage, especially perishables. It’s best to move quickly with purpose or temporarily store items in a cooler if you’re going to be a while.
Always ensure every component is completely dry before putting it back. Less moisture means fewer chances for mould or mildew to start a party in your fridge. Sticking to these tips means you avoid common cleaning headaches and keep your appliance in top condition.
Best Practices and Maintenance Frequency
Keeping your fridge clean isn’t just about the deep cleans; it’s about maintaining a routine that makes those deep cleans easier. As a golden rule, aim to give your fridge a quick wipe-down once a week. This keeps spills from setting in and prevents odours from taking charge.
For a more thorough clean, plan on a deeper dive every three to four months. This step ensures that any lurking grime or hidden spills don’t become permanent fixtures.
Everyone in your household can chip in, and great news, there’s no scientific expertise needed. It’s about consistency and using the right tools rather than skill level. Making a shared chore chart is an easy way to spread the love—and workload—among everyone.
Incorporating these habits makes your fridge stay fresh all year round and ensures every bite from within is safe and tasty. So, time to put a reminder in the calendar and keep your fridge looking as fresh as what’s inside.